Keeping your vacuum cleaner in top shape is essential for maintaining a clean and healthy home. While many people remember to empty the dustbin or replace the bag, one important task is often overlooked: cleaning the vacuum filter. A clogged or dirty filter can reduce suction power, strain the motor, and even release dust back into the air you breathe.
The good news is that cleaning your vacuum filter is simple and doesn’t take much time. In this guide, we’ll walk you through everything you need to know — from understanding the different types of filters to step-by-step cleaning instructions. Whether you’re a first-time vacuum owner or just looking to extend the life of your machine, we will help you keep your vacuum running like new.
Know Your Vacuum Filter
Understanding the Different Types of Vacuum Filters
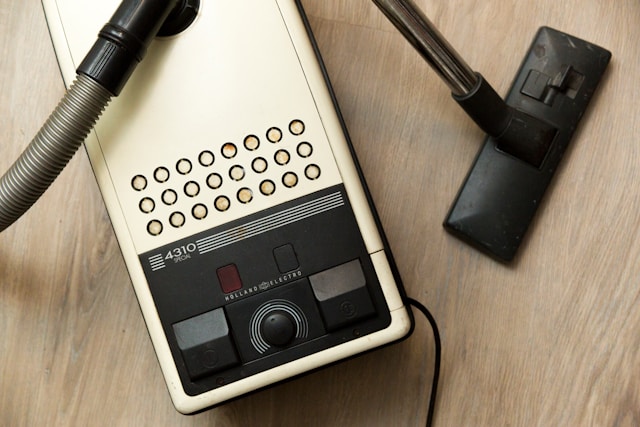
Before you start cleaning your vacuum filter, it’s important to know which type you have. Vacuum cleaners can come with a variety of filters, each requiring a slightly different approach to maintenance. The most common types include HEPA filters, foam filters, cartridge filters, and cloth filters.
HEPA (High-Efficiency Particulate Air) Filters are designed to trap very fine particles and allergens, making them ideal for homes with pets or allergy sufferers. They are usually more delicate and might not always be washable, depending on the model.
Foam Filters are typically used to catch larger debris and dust particles. These filters are usually washable and can be reused many times if properly maintained.
Cartridge Filters are often found in handheld and shop vacuums. They are usually made of pleated paper or synthetic materials. Some cartridge filters can be rinsed gently, while others need to be replaced when they become too dirty.
Cloth Filters are durable and often reusable. They are commonly used in commercial or heavy-duty vacuum cleaners. These filters can usually be shaken out or washed depending on the manufacturer’s guidelines.
How to Identify Your Vacuum Filter Type?
If you’re unsure what type of filter your vacuum uses, the first step is to check the user manual. Most manufacturers provide clear descriptions of the filter type and specific care instructions. If you don’t have the manual handy, you can usually find a digital version on the manufacturer’s website by searching for your vacuum model.
Visually inspecting the filter can also provide clues. HEPA filters typically look like thick, pleated paper blocks, foam filters appear soft and sponge-like, and cloth filters resemble heavy fabric bags. Cartridge filters are rigid and often cylindrical or oval in shape.
Why Knowing Your Filter Type Matters?
Different filter types have different cleaning requirements. Washing a non-washable HEPA filter, for example, could damage it permanently and reduce your vacuum’s effectiveness. On the other hand, failing to wash a foam filter regularly can cause clogs and strain the motor.
By understanding your specific filter type, you’ll not only extend the life of your vacuum cleaner but also maintain strong suction power and cleaner indoor air. Taking a few minutes to identify the right care method will save you money and ensure your vacuum continues to perform at its best.
When Should You Clean Your Vacuum Filter?
Recognizing the Signs That It’s Time to Clean
One of the easiest ways to know when your vacuum filter needs cleaning is to pay attention to the performance of your vacuum. A noticeable drop in suction power is often the first warning sign. If your vacuum struggles to pick up dirt and debris that it normally handles with ease, a clogged filter could be the cause.
Another indicator is an unusual or unpleasant odor coming from the vacuum. As dirt and dust accumulate, especially in washable filters, they can start to smell musty. In some cases, you may even see dust being expelled from the vacuum’s exhaust, which is a clear sign that the filter is no longer doing its job effectively.
Visually inspecting the filter is also a good habit. If the filter looks visibly dirty, covered in dust, or has a grayish or brownish color compared to when it was new, it’s time to clean it.
Recommended Cleaning Frequency
While the signs above are important, it’s also helpful to follow a regular cleaning schedule to prevent problems before they start. For average household use, most vacuum filters should be cleaned every 1 to 3 months. However, this can vary depending on the type of vacuum, the frequency of use, and the environment you live in.
If you have pets, allergies, or live in a dusty area, you may need to clean the filter more often—potentially every month. Heavy-duty vacuums used in workshops or on construction sites might even require weekly maintenance. Always refer to your vacuum’s manual for manufacturer-specific guidelines.
Balancing Cleaning and Replacement
While cleaning can extend the life of your filter, it’s important to remember that filters don’t last forever. Over time, even washable filters can become worn out or less effective. As a general rule, most vacuum filters should be replaced every 6 months to a year, depending on usage. If you notice that cleaning no longer restores your vacuum’s performance, it may be time for a replacement rather than another wash.
Taking a proactive approach to cleaning your filter will keep your vacuum running smoothly and help maintain a cleaner, healthier home.
Tools and Materials You’ll Need
Basic Cleaning Supplies
Cleaning your vacuum filter doesn’t require a lot of fancy equipment, but having the right basic supplies on hand will make the process smoother and more effective. The most important item you’ll need is clean, lukewarm water. Water is essential for rinsing out dust, dirt, and debris from washable filters without damaging them.
You should also have a mild detergent or gentle dish soap available, especially if the filter is particularly dirty or greasy. However, it’s crucial to use only a very small amount and to make sure the soap is fully rinsed out afterward. Harsh chemicals or strong cleaning agents can damage the filter’s materials.
A soft brush or an old toothbrush can also be extremely helpful. Use it gently to loosen stubborn dirt from non-washable filters or to pre-clean a washable filter before rinsing. Avoid using stiff brushes or anything abrasive that might tear or damage the filter.
Additional Helpful Items
Having a dry, clean towel nearby will come in handy for blotting excess water from the filter after rinsing. Gently pressing the filter between two towels can help speed up the drying process without causing damage.
You may also want to prepare a small bowl or bucket if you plan to soak the filter, and a well-ventilated space where the filter can dry completely. Some people like to use a fan to circulate air and reduce drying time, but avoid using direct heat sources like a hairdryer, which can warp or shrink the filter materials.
Optional Protective Gear
While not necessary for everyone, you might find it helpful to wear disposable gloves if the filter is very dirty or if you have allergies to dust and debris. A dust mask can also be useful to avoid inhaling fine particles while handling the dirty filter.
By gathering these simple tools and materials before you begin, you’ll make the cleaning process faster, safer, and more thorough. Having everything ready ensures that you won’t have to stop midway to look for missing supplies.
Step-by-Step: How to Clean Your Vacuum Filter
Step 1: Turn Off and Unplug the Vacuum
Before doing any maintenance on your vacuum, it’s essential to prioritize safety. Always turn off and unplug the vacuum from the electrical outlet. This prevents any accidental starts and reduces the risk of electric shock while you’re handling internal parts.
Taking this precaution also protects the vacuum from damage, ensuring you have full control as you disassemble and clean the filter.
Step 2: Remove the Filter Carefully
Locate the filter compartment, which is usually behind a panel or inside the dustbin. Gently remove the filter according to the manufacturer’s instructions. Some filters slide out easily, while others might have a latch or clip.
Be careful not to force anything. Damaging the housing or the filter could lead to costly repairs or replacements. Take note of how the filter is positioned so you can reinstall it correctly later.
Step 3: Tap Off Loose Dust and Debris
Once you have removed the filter, take it outside or over a trash can. Gently tap the filter against the side of the can or your hand to dislodge loose dust and dirt. Be sure to do this in a well-ventilated area or outdoors to avoid releasing dust back into your home.
For stubborn debris, you can use a soft brush to lightly clean the surface without applying too much pressure.
Step 4: Rinse Washable Filters with Water
If your filter is labeled as washable, you can rinse it under lukewarm running water. Hold the filter under the stream and allow the water to run through it until it appears clean. Avoid scrubbing too hard, as this might damage the delicate fibers of the filter.
If necessary, use a very small amount of mild detergent to help remove stubborn dirt, but make sure to rinse thoroughly to remove all soap residues.
Step 5: Clean Non-Washable Filters Gently
If your filter is not washable, never soak it in water. Instead, use a soft brush or a dry cloth to remove as much dust and debris as possible. Some non-washable filters can be cleaned more thoroughly using compressed air, but always check the manual to be sure this method is safe.
Attempting to wash a non-washable filter can lead to serious damage and reduced performance, so it’s important to be cautious.
Step 6: Let the Filter Dry Completely
After rinsing, it’s crucial to let the filter dry thoroughly before reinstalling it. Shake off any excess water and place the filter in a well-ventilated area, preferably under indirect sunlight or near a fan. Avoid placing the filter directly on a heat source such as a radiator or using a hairdryer, as excessive heat can deform or weaken the material.
Drying usually takes at least 24 hours. Even if the filter feels dry to the touch after a few hours, it’s best to give it a full day to ensure there is no hidden moisture inside.
Step 7: Reinstall the Clean, Dry Filter
Once the filter is completely dry, reinstall it back into the vacuum cleaner exactly as you found it. Make sure it fits securely and correctly, as improper placement can affect the vacuum’s performance.
After the filter is back in place, close any panels or compartments, plug the vacuum back in, and run it briefly to check that everything is working smoothly. You should notice improved suction and fresher air coming from your vacuum.
Enjoyed this guide of how to clean a vacuum filter? Then be sure to check out our other vacuum guides.